Riverwoods Village Hall
300 Portwine Rd.
Riverwoods, IL 60015
Office Hours: M-F, 8:30am - 1:30pm
Phone: 847-945-3990
Fax: 847-945-4059
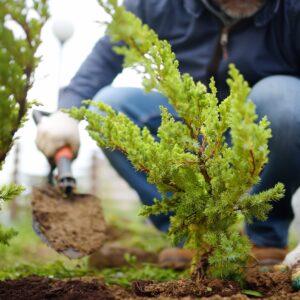
Making landscaping improvements within the woodlands to your Riverwoods property can be tempting. These steps will help guide you through the process.
1) Familiarize Yourself with the Tree & Woodland Protection Ordinance, which sets limits on how much woodland can be removed from a lot, controls the removal of desirable native trees, and encourages the removal of harmful invasive species. The ordinance also prohibits removal of any layer of protected woodland for development or landscaping purposes. *No more than 20% of the existing protected woodland (as delineated by the Village) on a lot can be removed and a Woodland Removal Permit is required.
2) The Woodland Delineation Map for each lot in the Village was completed in 2017 and should be referenced prior to performing any work on your property. Individual maps at the parcel level can be requested by contacting the Village Hall.
3) For Tree & Shrub Removal, please reference the Trees and Woodland Removal Flow Chart to verify whether your project also requires a Woodland Removal or a Tree Removal Permit. All trees/shrubs greater than 1.5 inches diameter are regulated by the Village. (The Tree Removal Permit is free for dead trees)
4) Schedule an Ecological Consultation with the Village's Ecologist to see your property qualifies for any of the Village's Cost-Share Programs, with the Village reimbursing up to 50% of your native plantings and installation costs, invasive shrub removal, rain garden installs, prescribed burn, and more!
5) Bringing in Soil or Compost? Up to 10 cubic yards can be brought on site without a permit. Contact the Building Department to apply for permit if you plan to bring in more than 10 cubic yards of soil or compost. No soil can be placed withing the delineated woodland on your lot.
6) Get Your Utility Lines Marked Before You Dig
7) Dig With Care: Use hand tools when digging within 18 inches of a marked underground line and always pay close attention to your surroundings. Contact the utility owner, as well as JULIE, if you think you have struck or damaged a line. Never try to repair it yourself.
Wondering if you need to contact JULIE before you dig? Click here for examples of common DIY projects that require a locate request.